Not all “knots” are true knots. Technically, a true knot does not need to be tied around anything; it can hold its form on its own without another object such as a post, eye-bolt, or another rope to give it structure. A hitch, by contrast, must be tied around something to hold together; remove the thing it’s tied to, and a hitch falls apart. A bend is a knot used to join two rope ends.
In practice, we often use “knot” as an umbrella term to cover all these types, but the distinction is useful to know.
Knot necessarily thrilled at the thought of becoming a knotaphile? By the time you finish reading this post from Paul Turner, Founder of TakeOutdoors, there’s a good chance you’ll be in the mood to declare at least one of these useful knots a close friend… (Source: We Are Explorers)
The water bowline is a type of knot designed for use in wet conditions such as being towed through the water, where other knots may slip or jam.
Although similar in finished appearance to the double bowline, the water bowline is formed with a clove hitch as the loop in the standing part of the rope. This is similar to the double bowline, which puts the running end through a round turn. The additional friction from the clove hitch increases the security of this knot.
When tying the Water Bowline, form a clove hitch first and then tie the knot by threading the end up, around, and down. It is a stable knot that is fairly easy to tie and to inspect. The extra half hitch, forming a Clove Hitch, provides a more secure grip on the tail end.
Learn, step by step how to tie a bowline for sailing.
If you’re just starting out with sailing you will absolutely need to learn this knot.
The best way to learn and practice this knot. Complete with troubleshooting guides and some more advanced variations.
The Bowline makes a reasonably secure loop in the end of a piece of rope. It has many uses, e.g., to fasten a mooring line to a ring or a post. Under load, it does not slip or bind. With no load it can be untied easily. Two bowlines can be linked together to join two ropes. Its principal shortcoming is that it cannot be tied, or untied, when there is a load on the standing end. It should therefore be avoided when, for example, a mooring line may have to be released under load.
Name: The name Bowline derives from “bow line“. The ‘bow line knot’ secured the line holding the weather leech of a square sail forward to prevent it being taken aback.
The Reef Knot or Square Knot is quick and easy to tie; it is a good knot for securing non-critical items.
This knot was used for centuries by sailors for reefing sails, hence the name Reef Knot, and tying things aboard ship. It is important that this knot should not be used as a bend (for tying two ropes together) and it can be unsafe and come apart. Be sure to form the square knot and avoid tying a granny knot, by making sure that both parts of the rope, the standing line and the free end, exit the knot together.
Tying the reef knot
Take two ropes and cross them (red over blue) to form a half knot. Cross them a second time (red over blue again) and pull the ends tight to form the knot.
‘left over right and under, right over left and under’
The sheet bend (also known as becket bend, weaver’s knot and weaver’s hitch) is a bend, that is, a knot that joins two ropes together. Doubled, it is effective in binding lines of different diameter or rigidity securely together, although it has a tendency to work loose when not under load.
‘The truckies knot or trucker’s hitch is a compound knot commonly used for securing loads on trucks or trailers. Using loops and turns in the rope itself to form a crude block and tackle, it has long been used to tension lines.
A new resource from PACI, the Professional Association of Climbing Instructors.
If you are an instructor who teaches knots for use in life critical applications – you should spend time studying all of the learning resources on this site. You will not find a better collection of knotting resources anywhere – and best of all, PACI has released all of this content free-of-charge to the public. Hundreds of hours have been invested in producing and compiling the technical content found on this web page – and every effort has been made to ensure that content is accurate and historically correct.
Form a bight in both ropes and overlap them. Pass each end around across itself – going over for the top bight and under for the bottom bight. Thread both ends past each other through the middle. Tighten to form the Zeppelin Bend.
Uses
The Zeppelin Bend is one of the bends employing interlocking overhand knots. It is a reliable bend that can be untied even after being heavily loaded but not, however, while still under load. It is an excellent alternative to the more widely used Double Fisherman’s because it eliminates the risk of jamming.
Warning
For the Animation, the ends were left short. For critical loads, e.g., when Climbing, the ends must be left much longer.
The Beer Knot is a bend used to join two pieces of tubular webbing. It is commonly used by climbers and arborists to create slings
Origin: The Beer Knot was introduced in the late 1980’s by an Austrian, Peter Ludwig, at a National Speleological Society Convention. It has been extensively tested.
Tying it: Many writers describe difficulty tying the Beer Knot. The Pusher Rod shown in the animation provides an excellent answer. Wire from a coat hanger was used. One end was tightly twisted into a loop and the end was cut obliquely as shown in the insert of frame 4. The design allows the end to be easily hooked into one layer of the strapping whilst avoiding exiting the second layer to catch on the outer tube.
Length: For one inch (2.5 cm) tubular webbing, a twelve-inch (25 cm) overlap is recommended. This provides about three inches (7.5 cm) of overlap each side of the finished knot. To save space, the animation employed a shorter overlap.
Strength: The one inch tubular nylon webbing used in the animation has a nominal breaking strain of 4,000 lb. Because the load is distributed to both sides of the finished loop, the nominal breaking strain of the loop should be 8,000 lb. However, the Knot weakens the strap to about 80% – indicating a breaking strain around 6,400 lb. The 15:1 safety ratio applicable for critical loads would indicate a safe working load up to 400 lb.
Precautions: Once set by a major load, the Beer Knot enjoys an excellent reputation for reliability. Many writers say that it does not appear to slip. Nevertheless, it is wise to checkboth ends of the knot: one tail end is visible; the other is easily felt.
Alternatives: Webbing straps may also be joined using a Water knot. However, the water knot markedly weakens the strap and may reduce the nominal breaking strain to about half.
The Water Knot (also known as the tape knot, ring bend, grass knot, or overhand follow-through) is a knot frequently used in climbing for joining two ends of webbing together, for instance when making a sling. It is tied by forming an overhand knot in one end and then following it with the other end, feeding in the opposite direction.
The ends should be left at least 7.5 centimetres (3.0 in) long and the knot should be “set” by tightening it with full body weight. Once tied, for additional security each end should be tied in a double overhand stopper knot around the other standing end.
Warning Failure that may occur in at least two quite different ways:
1. Cyclical loading can cause the outer strap to work loose;
2. A snag or obstruction can catch the outer strap and flip it loose. Various options are available to minimize these risks:
Use long tails and tie an Overhand Knot in the tail of the Outer Strap.
The Munter Hitch can be used to belay or rappel if you lose your belay device. Seek out instruction on belaying and rappelling with the Munter hitch before attempting it by yourself.
Hold the rope in both hands, and form a loop by crossing the rope over itself. Then form a second loop in the same way.
Now fold the two loops toward each other like you’re closing a book and clip a locking carabiner through both loops.
Also known as a Lark’s Foot Knot, a Cow Hitch and a Lanyard Knot.
The Girth Hitch is an easy way to connect a loop of webbing or cord to a fixed point like a tree, or a climbing harness’s tie-in points. Here we show the hitch around a carabiner but the process is the same on any object.
When completed, the Cow Hitch is identical in structure to the Lanyard or Girth Hitch. The difference is in how they are tied; the Cow Hitch is more practical with long rope where only one end is available, e.g. when the other end is tied to an animal. The Lanyard Hitch, on the other hand, requires threading the entire rope through the formed bight which makes it impractical for use with long rope.
The Double Fisherman’s Knot is a very secure way to join two ropes or form a cord into a loop. It’s very difficult to untie after it gets weighted, so it’s a good choice for making Prussik loops.
The Clove Hitch allows you to secure a rope in place on a carabiner. It’s easy to untie after taking a heavy load, and quickly unravels when you unclip it from the carabiner. Many climbers use it to connect directly to an anchor. You can tie a clove hitch with two hands or with one.
Hold the rope in both hands, and form a loop by crossing the rope over itself.
Then form a second loop in the same way.
Now move the second loop behind the first, and clip both loops with a carabiner. Dress the hitch by pulling both strands tight.
If you’re at the anchor, you can also tie the clove while you hold onto the anchor carabiner with one hand.
Grab the rope in your fist with your finger pointing down the rope.
Bring your hand up so that your finger points up and toward you.
Then clip the rope into the carabiner.
Now grab the rope below the carabiner and do the same thing again. Grab it with your finger pointing down, bring it up so that your finger points up and toward you, and clip it into the carabiner.
The Alpine Butterfly knot forms a loop in the middle of a rope and is especially useful for the middle member of a rope team because it won’t deform after a pull in either direction.
The Stone Knot (or Stein Knot) is a blocking knot technique that can improve safety and speed things up on canyoneering descents. The Stone Knot is a family of knots, since there are at least four forms that qualify as Stones, while being somewhat different.
The Stone Knot is made in a rope set-up for a rappel, near the anchor. The Stone isolates both rope strands, so each strand can be used independently. This allows the next rappeler to start setting their rig up while the previous rappeler is making their way down the drop. When conditions allow it (2-person strength anchor, no loose rock), the second rapper can start down as soon as they are ready. With the rope “Stoned”, a big-boned canyoneer can rap double-strand if they prefer.
The object that completes a Stone Hitch is a carabiner, and it is best to use a large locking carabiner for this purpose, such as the Petzl William (shown above) or a Petzl Attache. Using smaller carabiners makes the knot more awkward to set up correctly.
Method
See how to tie the Stone Knot (and variations) on Canyoneering USA
A Taut-line Hitch is used to create an adjustable knot that can slide back and forth along a line and is secure assuming it is tight. Use it to provide adjustable tension for guy ropes on a tent or tarp.
To tie this hitch, create a loop by wrapping around something like a tree or tent peg. With the free end of the rope, wrap towards the peg twice around the main line. Make one additional coil around the main line on the outside of the coils you’ve just made and tighten the knot. Slide it up and down on the main line to adjust tension.
The Sheet Bend is a useful knot for tying two ropes together, and is recommended for joining two ropes of unequal size. It is suitable for most non-critical applications. It is important that the tag (free) ends of both ropes of the sheet bend be on the same side of the finished knot. For more security use the doubled version (Becket Bend) which is the same as the single version but with an extra coil around the standing loop.
The Sheet Bend also goes by the name of Weaver’s Knot when employed in yarn or twine. It is commonly used for joining threads that have parted in a loom or as a permanent knot tied in small material.
The Sliding Double Fisherman’s Knot creates an interesting modification of the Prusik Loop to provide an adjustable eye.
For jewellery making it provides an adjustable length necklace or bracelet.
Method
Lay out the rope to create two bights.
Wrap one end twice around the adjacent bight and insert it under the two turns.
Then wrap the other end twice around its adjacent bight and insert it under the two turns.
Pull the ropes to make the two knots touch.
Adjust the loop sizes to suit your purpose and tighten.
The Blake’s Hitch is a slide and grip knot generally used by arborists for ascent and descent.
This is the classic set-up for beginners getting into tree climbing. For production climbers, this set-up is essential knowledge, allowing for a secondary tie-in in a pinch, or an emergency bail-out when all you have is a rope and a carabiner.
Method
Wrap the end of the line four times around the climbing rope. Bring the end back down, around itself, and tuck it behind the climbing rope and under the first two turns so that it exits in the middle. Tighten to achieve a tight, neat, knot.
In practice, when tying the Blake’s Hitch, it is an advantage to wind the first two turns while your thumb is inserted up alongside the climbing rope. This maintains a pathway to make it easier to thread the line later. Note: This final threading must pass behind the main rope as shown.
The free end should be kept long and maybe secured with the addition of a stopper knot.
nots are vital to camp craft & creativity. It’s interesting to learn how many people these days have forgotten how to tie a useful knot. It takes time, patience and practice learning knots. But once you practice them, they help to save so much time, effort and hassle. Knots have the ability to create new possibilities.
All the knots and diagrams are from a handy and affordable pocketbook. The Pocket Guide to Essential Knots by Peter Owen can be ordered from the Outdoors Queensland Shop.
The Pocket Guide to Essential Knots will show you how to tie 21 key knots for everyday use: for home, work, hobby and play activities, indoors and outdoors.
This small handy pocket book does not pretend to be a knot encyclopaedia, nor does it contain any knot-tying jargon or technical terms. It just contains easy to follow step-by-step tying instructions and possible uses for a handful of very useful and practical knots that should cope with most situations the average person will encounter.
Many people know how to tie one or two knots, not always correctly! This book is designed to give you a few more options. By helping you choose the right knot for the job and tie it correctly, this book hopefully will make life run just a little bit more smoothly.
Peter Owen is an award-winning illustrator and graphic designer and has worked for an impressive list of international clients, including Coca Cola, Nestlé, Guinness, Disney and McDonald’s. He has also written and illustrated over twenty published books on a variety of subjects including the graphic arts and outdoor pursuits. He is married with three children and lives in the Cotswolds.
Knots: they attach us to ropes, connect slings to trees, substitute for dropped gear, secure tents, create belay anchors. Like the Force, knots surround us, protect us, and bind our galaxy together. Even a sport climber whose shoes close with Velcro knows a few knots. But here are a few things you might not know.
1.The word “knot” is related to knob, knoll, and knuckle, but not to knowledge. It is knoten in German, knot in Dutch, knut in Swedish, nudo in Spanish, and noeud in French.
2.The Inca’s only “written” language was a system of knots tied into necklace-like “documents” called quipus, or “talking knots.” Some scholars think quipus recorded only numbers, but others believe that they also told stories and encoded historical events. A select class of Incas apparently interpreted the knots, and the code has never been definitively deciphered. Knots were also used for record keeping in ancient China, and the Chinese Book of Changes, almost 2,500 years old, associates knots with contract and agreement.
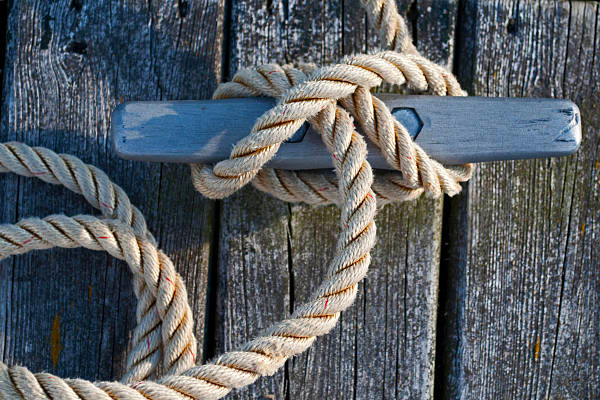
3.The “bitter end” of a rope refers to its working end, intended to be tied off to a bitt, a cleat-like fastening point found on docks. If a longshoreman bobbled a thrown line or missed his tie-in move as a ship came in to dock, he might be left “hanging on to the bitter end” as the untethered ship drifted perilously past its mark.
4.The “feel” of a rope is called its hand. A hank is a looped bundle of rope, e.g., a lead line done up in a mountaineer’s coil. A bend is a knot that ties the ends of two ropes together. A hitch attaches a rope to a fixed object, such as a tree or carabiner. A short section of slack rope that does not cross itself is called a bight. If it crosses itself, it’s a loop. Twist a loop and you form an elbow.
5.A “climbing rope” is a misnomer. “Rope” properly refers to the raw material—a spool of accessory cord, for example. Once cut to length and given a designated purpose, a rope should be called a line.
6.The square knot—the first knot many people learn besides tying their shoes—may be the single greatest hazard in rope-related activities, due to its default use in sketchy rigging scenarios by reckless amateurs. To see some of the square knot’s antics, tie a firm square knot, then pull on one tail until the knot flips (or capsizes in knotting language). One strand will turn into a lark’s head knot, or girth hitch, feebly grasping the perfectly straightened second strand. Off belay!
7.Anytime you tie a knot in a rope, you weaken it; in drop tests and pull tests, a rope typically breaks at the knot. The strongest tie-in knot you can use is the figure-eight follow-through, which, when pull-tested, breaks at 75 to 80 percent of the rope’s full strength. The bowline is a slightly weaker knot, at 70 to 75 percent, followed by the double fisherman’s at 65 to 70 percent. The clove hitch is the weakest of the common climbing knots, at 60 to 65 percent. Note, however, that modern climbing ropes have a tensile strength of upwards of 6,000 pounds, so even a clove hitch would fail at something like 3,600 pounds. The elasticity of climbing ropes makes that amount of force virtually impossible to generate in reallife scenarios.
8.Although the bowline has been in use for thousands of years, the name first appeared in written English in 1627, when one John Smith called it the Boling Knot. French alpinist Gaston Rebuffat favored the bowline for his tie-in, as did El Cap pioneer Warren Harding. If you make a pre-dawn hike miles into the backcountry only to find you’ve forgotten your harness, you’ll be wrapping the rope around your waist to tie the bowline on a coil, or Space Cadet’s Hitch.
9.To help loosen a stubborn knot, roll it with your palm against a rock. For really stuck knots, such as those found in manky tied slings, soak the knot in water. Conversely, to create a more secure knot, soak it before tying, cinch it tight (bounce test–style), and let it dry.
10.Gorillas and weaver birds are both known to tie knots. Neither is known to wear a climbing harness.
The trickery inherent in the Slippery Hitch stems from the fact that it is stable when weight is applied to one end, but comes undone when the other is pulled. Practically speaking, the Slippery Hitch has a few uses: it can be employed to tether small, light boats (which leads to it being occasionally known as the Canoe Hitch). while the fact that it can be so easily released leads some to use it for securing sails to small sailboats.
A more stable version is the Slippery Clove Hitch.
The Human Knot has been long used as a team-building exercise and a fun way of breaking the ice with new groups of people. All it requires are willing players and an open space! Depending on the number of people in your group and the complexity of the human knot you make, this problem solving game will usually take around 15 to 20 minutes.
Instructions
This exercise works well with “knots” of between five and eight people. If the group is larger than eight, break into smaller groups.
Have each group stand in a circle.
Have people cross their arms in front of their bodies and join hands with two other people. People who join hands should not be standing next to each other, and everyone should be connected to two different people (that is, not holding both of one person’s hands).
The group has now formed a “human knot,” and their job is to get out of it without letting go of each other’s hands. In most cases, with a lot of twisting and turning and stepping over and under each other’s arms, this can be done in a few minutes. It is all right if people end up facing outside the circle.
If the group seems hopelessly entangled, have them pass a pulse (see Pass the Pulse). If everyone in the knot receives the pulse, they are in just one knot and are likely to be able to get untangled. If not, they are in more than one knot and should probably break up and try it again.
Brainstorm what each knot is like or could represent.
Discuss how this could relate to current situation or activity
What was like …
Overhand Knot: clear, simple, made sense
Bowline: complex, difficult to understand
Reef Knot: what came together
Figure 8: what linked people together
Clove Hitch: what made you feel safe
Slip Knot: what made you feel on edge, exposed
For example:
An overhand knot could represent something straightforward that makes sense or clear easy to follow communications.
A figure eight could represent someone who inspired confidence or safe well considered actions.
The underwriter’s knot provides strain relief of electrical wiring. Electrical appliances have it to protect the terminal connections inside them. It is mainly used by electricians where they suspect rough treatment of wiring like in floor and table lamps. Presumably, it was given the name underwriter’s knot by fire underwriters who knew the importance of the knot in preventing the danger of electrocution and fire.
Uses
Preventing the cords of electrical appliances from becoming loose at the socket connections on pulling.
For re-wiring a light fixture or lamp.
The Stevedore Knot is a moderately bulky, reliable stopper knot tied at the end of a rope. The knot owes its name to stevedores who used it for loading and unloading cargo from ships. It is less prone to jamming, can be untied more easily (even after taking a heavy load) and bulkier than the closely related figure 8 knot.
Other Uses
It is a great knot for setting up a tarp.After passing an end through a grommet, for example, you can use it to secure that end.
Prevents a cargo fall end from unreeving – pulling through a block, pulley or other object.
A monkey’s fist, so named because it looks like a small bunched fist, is tied at the end of a rope to serve as a weight, making it easier to throw, and also as an ornamental knot. This type of weighted rope can be used as a hand-to-hand weapon, called a slungshot by sailors. It was also used in the past as an anchor in rock climbing, by stuffing it into a crack.
The Honda Knot provides a loop in the end of a line and is commonly used to make a sliding loop for a lariat or lasso. The Honda knot creates a non jamming connection, allowing the lasso to be easily adjusted to hold or release animals. The lasso is typically made of a stiff rope to help maintain it’s shape and improve usability.
It is favoured to make a lariat commonly known as a lasso or sliding loop that is typically used in applications for ranching or farming. It’s used in applications for ranching and sporting events such as rodeos to capture cattle and other livestock.
How to tie a lasso.
Start by creating a Honda knot. This is done by first tying an overhand knot and don’t tighten it just yet. Create a second overhang knot, but this time at the end of the tail end, this will act as a stopper.
Now feed that stopper knot under and back through the first overhand knot. Tighten and dress accordingly.
Now take the other loose end of the rope and feed it through the Honda loop.
The Kalmyk Loop is a fixed loop still largely unused in the West, but common in Russia and often used instead of the bowline. The knot is named after the Kalmyks, a nomad ethnicity in Russia. It is very quick to tie, it is secure, and it undoes quickly when pulling the free end. Without the slip, the knot is known as the Cossack knot or Eskimo bowline.
How to Tie the Kalmyk Loop
The Kalmyk Loop is relatively easy to tie and also untie even if it has been under load. It is another one of those little knots, that once you learn how to tie it, you do not easily forget it. Once mnastered the Kalmyk Loop is a very fast knot to tie.
Serving a somewhat similar purpose as a single or double Sheet Bend, but more secure, the Racking Bend is used for joining ropes of different diameter. The term racking refers to the weaving that binds the two sides of the bight of the larger rope together. The thinner line may then be used to throw a thick line such as a hawser from ship to shore or ship to ship.
How to tie the Racking Bend.
Form a bight at the end of the heavy rope. Pass the thinner line into the bight and begin weaving the line in a figure-eight fashion around and through the loop, working from the bottom up.
Make at least four complete turns around the bight. It helps to pull each one tight as it is completed.
Finish the knot with a Half Hitch or two around both lines of the heavy rope.
The One-way Knot is a special purpose bend that can be used to join two lines when it is known that the knot will have to pass through a shackle or pulley. Because the tails or working ends of the knot all face in the same direction, the knot is less likely to get stuck in the hardware it must pass through.
How to tie the One-way Knot or One-way Bend.
Form a loop in the end of the rope that goes in the direction of the pulley or other hardware that the knot will be passing through.
Pass the working end over the standing line and feed it up and through the first loop, as in a Figure Eight.
Insert the working end of the line to be joined adjacent to the working end of the first rope where it exits the knot and begin to retrace the first knot.
Keeping on the same side of the first rope exit the first loop alongside the first rope. Leave fairly long tails with the both ropes and pull all four ends tight to set the knot.
A similar knot is the Tucked Sheet Bend which might be just a tad more robust, useful if the knot is to be dragged through brush or over rocks.
A collection of useful knots, gift wrapping and bow tying techniques that will help you create the best looking presents under the Xmas tree.
How To Wrap A Gift in 5 Simple Steps
With so many parties, anniversaries, weddings and other festivities, gifts are always needed. Whether you’re just looking for styling ideas or if you are wondering how to wrap a gift for the very first time, we’ve got you covered! Wrapping a gift is easy — just follow these simple steps. To start, you will need wrapping paper, tape and scissors. If you want to add a bow and a tag, have those handy too!
How to Wrap a Gift
How to tie a PERFECT BOW! Every time!
How to Make a Bow
Watch a video on how to make a bow and follow our easy step-by-step instructions.
The “barrel hitch” named for its use in hoisting cargo aboard ships, is a simple yet effective way to suspend an object. The barrel hitch keeps it vertical. It works by forming a “hitch” around the object, which supports it from either side and underneath whule keeping it vertical. The Barrel Hitch can be used to hoist a container that has liquid in it with the top open. It is also very useful in carrying a bucket, water container or bottle.
Method
Stand the barrel/bottle on the lifting rope/cord. Tie an Overhand Knot across the top. Spread the Overhand Knot until it embraces the top of the barrel. Join the ends with a Bowline and lift.
Alternatively, lay the Overhand Knot on the floor, create the figure 8 appearance, and place the barrel on the center and tighten.
Warning: To make a stable Barrel Hitch, the rope/cord encircling the barrel/bottle must be well above the center of gravity but far enough below the top to avoid slipping off. Also, care must be taken to ensure that the rope/cord is properly centered under the barrel. With smooth and steady lifting, the Barrel Hitch provides reasonable security and safety.
The Halter Hitch is a quick release knot used to tether horses.
It’s fast and easy to tie, but the true value of the quick release knot lies in its ability to be quickly and easily untied in the event of an emergency. If a tied horse panics and pulls back on the rope, a single tug on the end of the lead will free him.
The quick release knot’s ability to provide an emergency exit is the reason it is valued as the knot of choice for safely tying horses.
Horses should be secured at withers-level or slightly higher to a sturdy, fixed object, such as a fence post (never a fence rail), tree, hitching rail, or tie-ring screwed into the wall. The lead rope should be tied to allow just enough slack that the horse can hold his head normally, but not so loose that he is able to lower his head to the point that he could potentially get his leg over the rope. Two to three feet of lead rope is about right for most horses, and ponies should be tied shorter. (Jess Hallas-Kilcoyne)
The Marlinspike Hitch is a wonderful way of quickly gripping a pole or a bar to take weight. The ladder shown in the animation is an excellent example. However, if used as a ladder, several cautions must be observed:
Correct End: Each Marlinspike Hitch must be made correctly. For a ladder, always make the final bight in the “top” end (the standing end) and tuck it through the loop. The result will then function as a Noose: the greater the force, the tighter the grip. If the wrong end is used, the reverse is true. A Slip Knot: is formed and increasing force loosens the grip.
Keep Level: Each rung should be horizontal. The ropes at the top of the ladder should be secured so that the rungs remain level to minimize the risk of a hitch sliding off its rung.
Inspect: If one of these rope ladders has been stored, the hitches will have loosened and may have slipped. Make certain the correct end is used as the top and inspect each rung to be sure it is level and gripped.
The Heaving Line Knot adds bulk and weight to the end of a rope, making it easier to throw the line
Heaving Line Knot Tying Instructions
Make a two bights next to each other in opposite directions at the end of a rope. Make the bights approximately the desired size of the finished knot. Leave plenty of rope for the working end to make the wraps needed next.
Pass the working end through the top bight and wrap around both strands of that bight only.
Continue making wraps but now encircle all three strands working down the ropes.
Pass the working end through the opening of the bottom bight to finish theknot.
Tighten the knot by first pulling up on the top loop, then pull down on the standing line.
Have your friends pick up the string and try to form a knot with one hand. Most likely, they’ll wiggle their fingers around like a mad spider, but with no luck. They’ll say it can’t be done, until you show them differently
Hold your hand so the fingers are one on top of the other with the thumb up, and hang the string over your first finger near the base of the thumb.
Twist and bend your hand so your middle finger picks up the string behind your hand.
Shake your hand downward so the string slides off your fingers (but don’t let go!).
There, hanging in space, will be a loose overhand knot.
This is a classic puzzle that has been around for at least 250 years. It is challenging, but it gives you a chance to get students up and moving.The solution depends on lateral thinking and topology or the mathematics of distortion.
The Set-Up
For this puzzle you need two people. Each person will need a piece of rope with a loop tied in both ends, so it can be worn as handcuffs. The rope should be reasonably long, so that the person wearing it can easily step over it if they want.
Put the loops on one person’s wrists, tighten the loops a little leaving some space between the rope and the wrists. Take the second rope loop it around the rope the first student is wearing and then put the loops on the second person’s wrists.and tighten the loops a bit. The handcuffs are now looped around each other so the people are tied together.
They now have to find a way to separate themselves from each other while following these rules: The handcuffs cannot be removed from the wrists. You cannot break, cut, bite through or in any other way damage the rope.
Now, your task is to grab its two ends, and without letting it go, tie this knot in the middle.
The Solution
In order to do this, first cross your arms, and from this position, grab the two ends of the rope. Once you untangle your arms, the knot will appear on the rope.
In days gone by lifting a sack was a very common thing to have to do. When the sack has been opened, the Sack Lift Knot is the perfect knot for the job, as the “open sack” forms part of the knot as well as the rope.
The Sack Lift Knot is particularly easy to tie and also untie, even when it has been under extreme load, and would be useful for suspending sacks for a period of item. The one disadvantage is that the knot becomes insecure when not under constant load. As soon as any weight is taken away from the knot is can easily become undone.
New mathematical model predicts a knot’s stability.
In sailing, rock climbing, construction, and any activity requiring the securing of ropes, certain knots are known to be stronger than others. Any seasoned sailor knows, for instance, that one type of knot will secure a sheet to a headsail, while another is better for hitching a boat to a piling.
But what exactly makes one knot more stable than another has not been well-understood, until now.
Share your favourite knot
Have an interesting knot or useful knotting resource to share?
Let us know by Sharing a Knot
A knot not knotted neatly is a knot not knotted!
Newsletter
Sign up for the eNewsletter and keep up to date with everything outdoors in Queensland. After you click Subscribe, check your email to confirm.
Become a member
We welcome membership applications from outdoor organisations and individuals